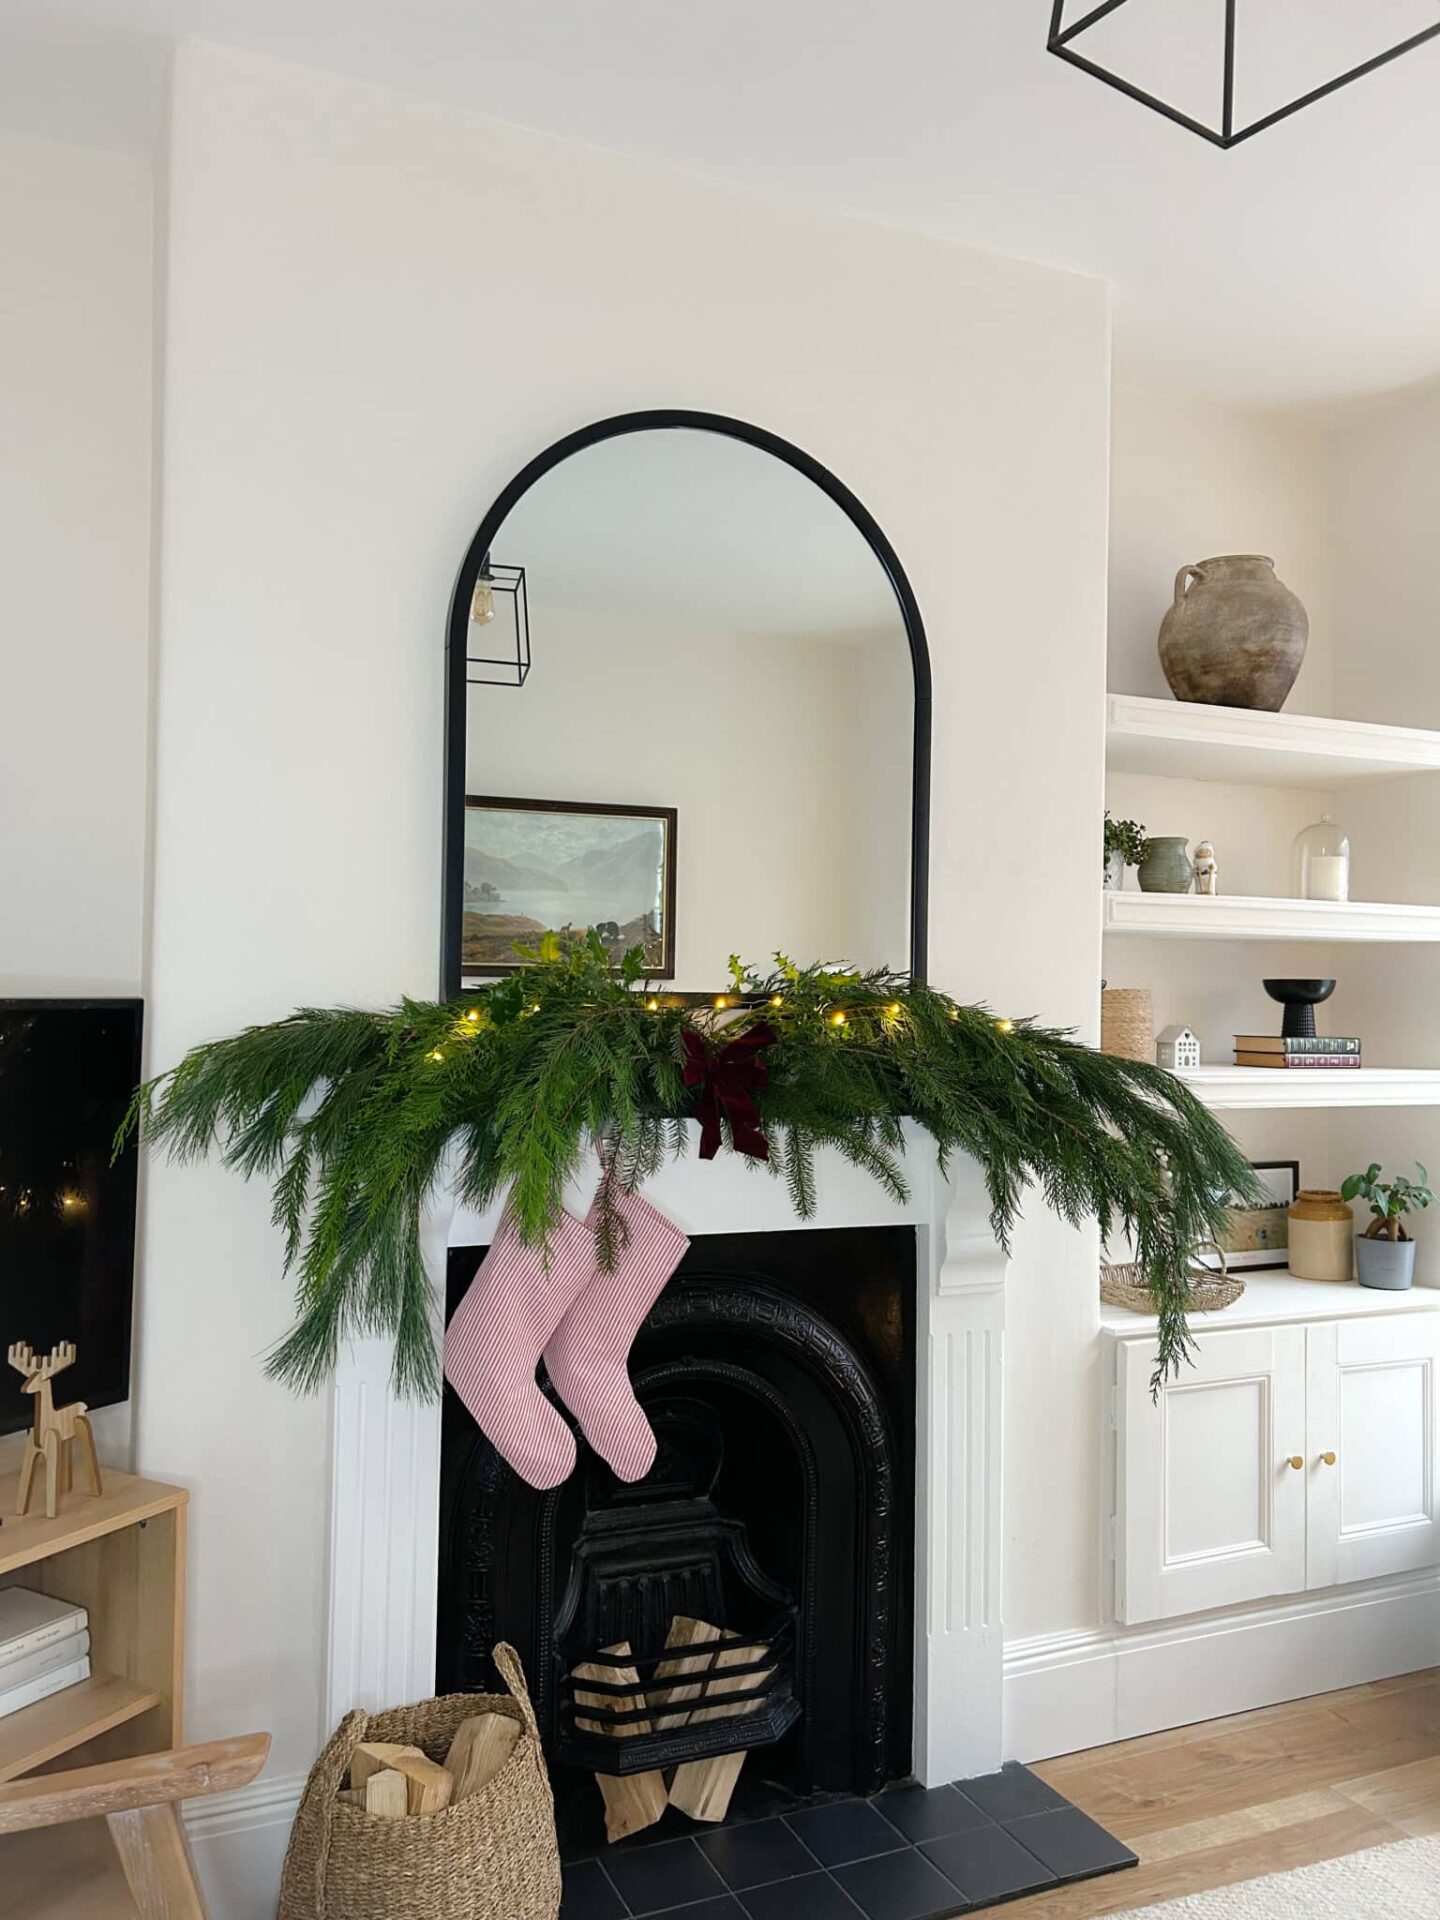
One of the best ways to create a focal centrepiece in a room is with a Christmas fireplace mantel garland. My problem? I felt that there was nothing available online or in-store that looked real, authentic and wasn’t going to cost £50 + to achieve.
My goal was to create a stunning, authentic Christmas fireplace mantel garland that was wholly foraged for free, and totally easy to create.
Join me as I show you step by step how this garland was created, and how you can achieve this too for your home during the holidays.
If you want to achieve a farmhouse, rustic modern theme in your home, this is just the perfect look!
DIY Christmas Fireplace Mantel Garland
What You Will Need
- Oasis floral foam bricks or compact moss for a more eco-friendly solution
- Cutters / gardening gloves / bag
- Foraged materials (everything goes, I’ll recommend some perfect types to create a similar garland)
- Bow / ribbon
- Stockings & Stocking holders (optional)
Get Foraging Your Materials
Garlands can become incredibly expensive if you want them to look full and beautiful, and doing this as inexpensively as possible was so important.
I wanted to show people this Christmas that you can have beautiful decor on a budget, whilst natural generally does look best (IMO)!
All of the materials used in my shown garland were 100% foraged from a local woods. You’ll need a pair of gardening gloves to protect your hands from the prickly guys, a pair of cutters or pliers and a bag to put everything in.
I’ve recently discovered these combination pliers from Maun, that let you bend and cut wire without swapping tools (and they cut through hard wire far better than normal pliers).

My best idea? Get way more than you actually need. This is the best way you’ll be able to create a gorgeous garland, there’s nothing worse than just being a little bit short.
There was a lot of off-cuts from trees that had recently been cut down in the woods so when I foraged I was lucky to take away some really huge branches, this is perfect as you can cut down as required. You’ll also need some smaller off-cuts for filling gaps in between.
The types of foliage I picked up for this specific look are;
- Cedar tree
- Fir tree
- Holly tree
- Anything goes, you can add colour with berries or introduce brown stems if you prefer that colour scheme.

Clean The Mantel
Once you’ve got all your foliage picked, you’re ready to start positioning it over the fireplace. Firstly, make sure you’ve wiped down the mantel so it’s clean, it’s best to avoid using sprays or wipes as chemicals can stop the oasis block from adhering properly. It’s then good to go!

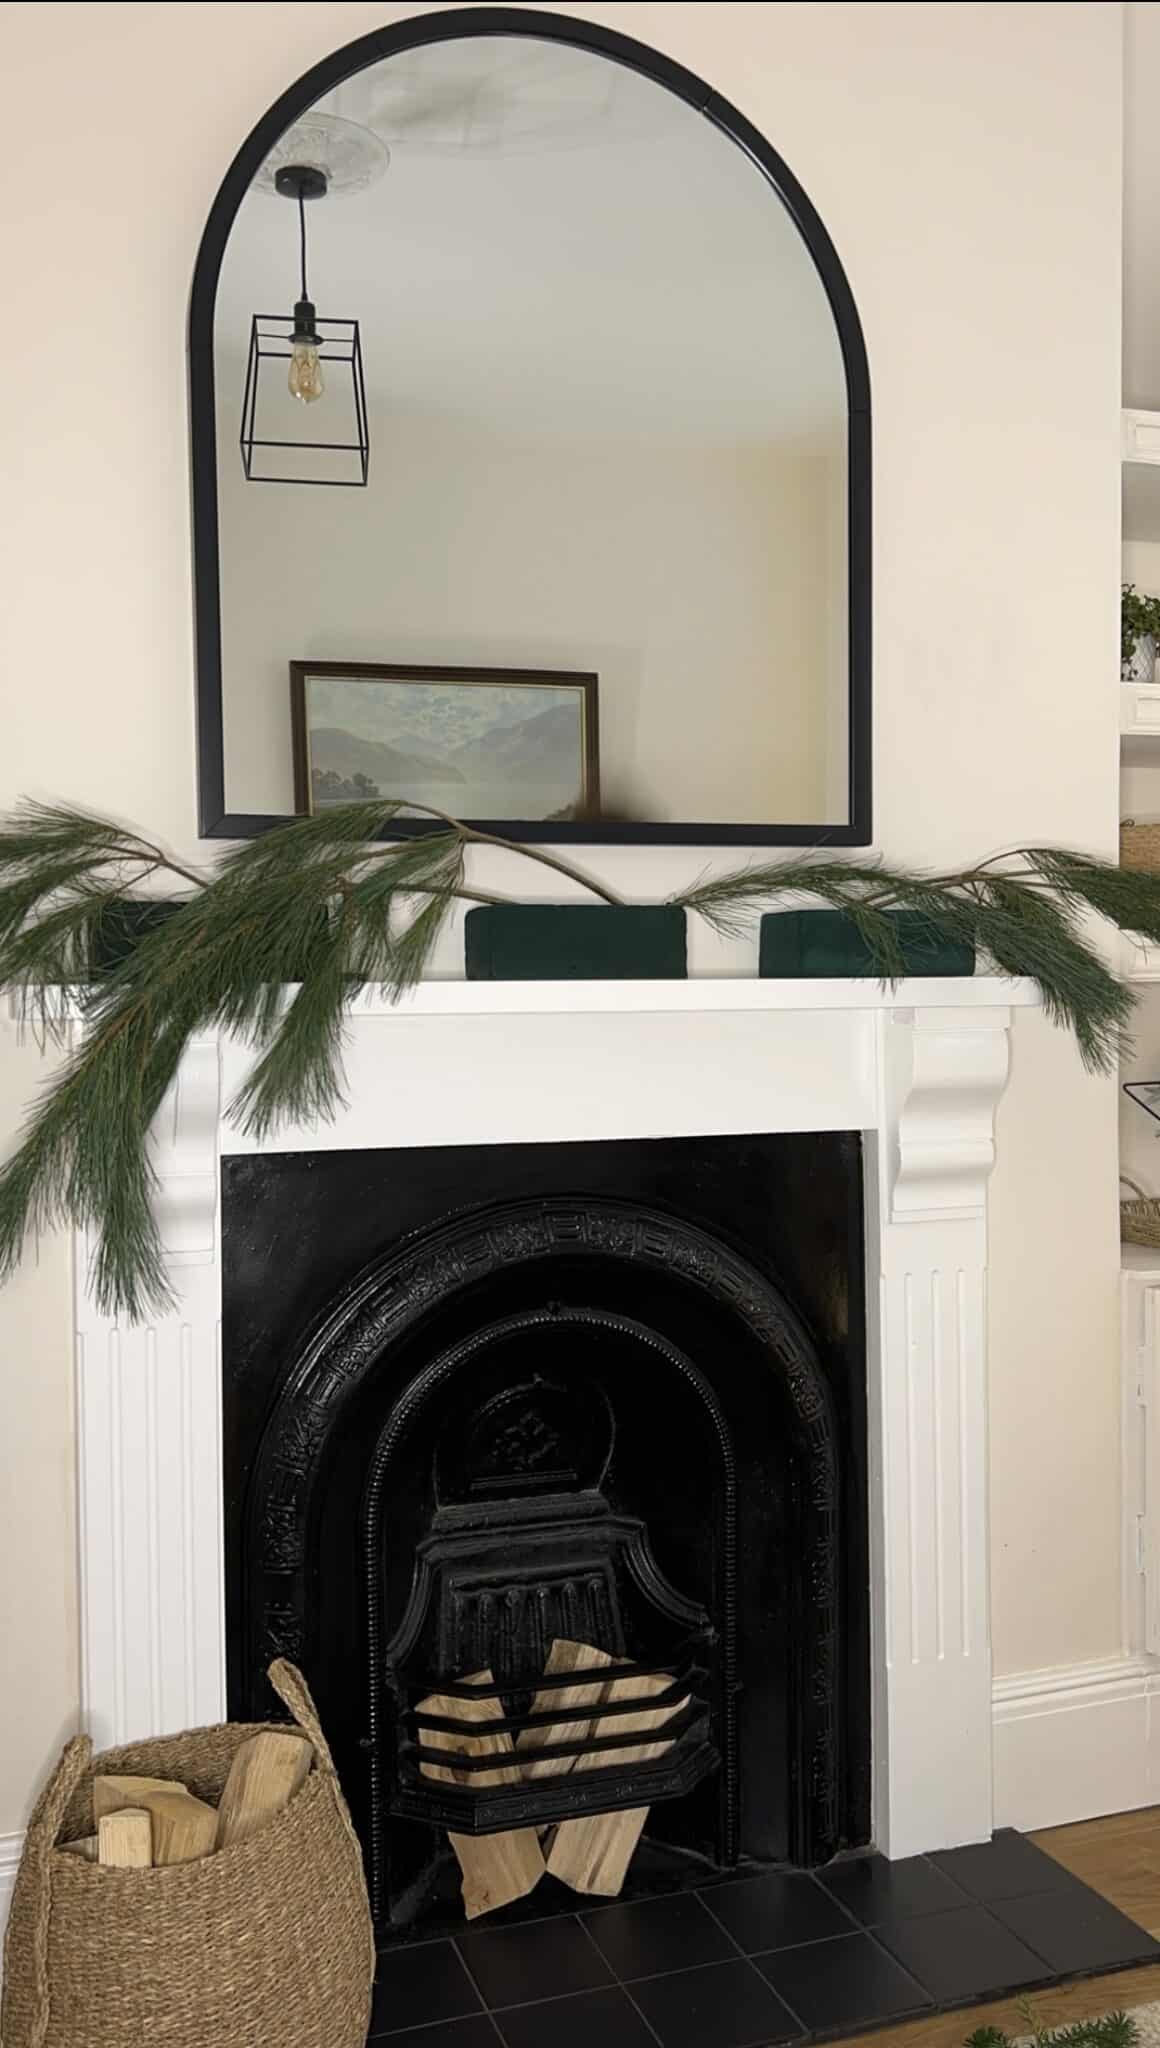
Position The Oasis Bricks & Start Creating The Garland
This was my first time using oasis bricks so I definitely learnt the to-do and do nots for using it. These foam bricks need to be fully submerged in water before use, it says they only need to be soaked for 2 minutes, and no longer than 20 minutes.
You need to then put these onto trays before placing on the fireplace, you can buy specific trays for oasis bricks or improvise with something you already have at your disposal.

I made the mistake that I literally used them straight away and they were absolutely dripping everywhere and water was coming out with every stem I put into the brick! There was NO info online about this though and nothing on the packaging. So, once fully soaked, I would personally recommend leaving them to stand for a while to ensure the water has fully been soaked through the foam.
Oasis floral bricks are available from most florist and craft stores and they’re super cheap. In the UK, I picked them up from Hobby Craft, only £1.50 per brick and I used three for the mantel, you could get away with two but you really need at least three to form the proper structure. The trays are only £1 too if you do need them, they can be re-used year after year.
This type of method for creating the structure is perfect for natural foliage as the moist bricks keeps it fresh, whilst it’s highly malleable and easy to insert the stems into the structure, without any of it moving over time. I’ve not found a better way to structure a garland, I’ve seen people experiment with command hooks but there’s no guarantee you won’t damage your paintwork or mantel in the process if you use this method.
I’d also recommend putting them on top of kitchen paper so they absorb any extra water, this will avoid staining or creating any damp issues on your wall.
Once the oasis bricks have been positioned, you can then start building the garland!
This process really is a case of trial and error, you’ll get a feel for it when you start adding stems and regularly stepping back and looking is the best way to see where else needs filling.
I started with the left side, then added to the right and kept building like the layers up like this. I started with using the cedar tree stems first as these are bushy and good for building a base. I mostly layered with snippets from the fir tree as these were perfect for building that gorgeous drop on either side.

Don’t be alarmed if you can still see the oasis bricks poking out. When you get to this stage, start adding smaller stems into the bricks that will fill the gaps and fluff up these sections without adding much bulk to the overall garland.
Once I was satisfied with the bulk on either side and the sections were filled, I added some holly stems to the top for different texture against the fir tree stems. You could top this with eucalyptus, berries, or anything you wanted to, a little pop of red colour will add a traditional look to the finish.
Add A Ribbon or Bow
This part is totally optional. Most garlands seem to add detail to either end, but I love adding the finish touch to the middle like the garland was a bow, it adds a refined and elegant finish.
I picked this pre-made wire bow up from Dunelm for £2. But you could easily make your own one, I would recommend adding wire to ribbon if you’re making your own though so you give it structure.
You could add bells, or decorations on top to this part as well to match your home decor scheme.

Put Those Stockings In Place!
I love the feel that stockings bring to a fireplace, such a cosy and inviting view. First, you’ll need some stocking holders or hooks that overhang the fireplace but will be hidden by the garland. These can be picked up pretty cheaply, I got a pack of 2 from B&Q for under £6.
Then you just need to hang those stockings! I always struggle finding the stockings I want that aren’t ridiculously expensive so this year I found the most perfect red ticker stripe fabric and my mum crafted these for me!
But you don’t need to play it safe, absolutely do mix and match different textures for additional visual interest. Anything goes with your Christmas home decor scheme.
Ticker stripe for me is such a classic print and perfect for that farmhouse, modern rustic style interior at Christmas.

Introduce Some Fairy Lights
Fairy lights are an absolute must for me in every inch of my living room during Christmas. Those twinkly lights are so cosy and warming, delivering the perfect ambience that the holidays demand!
I’ve opted for a simple string of fairy lights, less is more for this garland, but you can go as extra and as bright as you like. These are battery operated for ease so I can simply hide the battery pack round the back of the garland.

What do you think of my Christmas fireplace mantel garland? Do let me know if you’re inspired to give this a go this Christmas! Looking for more Christmas Inso? You’ll also love reading my how to decorate a Christmas tree step by step guide blog post.
